一.部署Nginx (Zabbix监控管理控制台需要通过Web页面展示出来,并且还需要使用MySQL来存储数据,因此需要先为Zabbix准备基础LNMP环境。) 二.配置Nginx支持PHP动态网站,因为有大量PHP脚本需要执行,因此还需要开启Nginx的各种fastcgi缓存,加速PHP脚本的执行速度。 三.源码安装Zabbix Server (多数源码包都是需要依赖包的,zabbix也一样,源码编译前需要先安装相关依赖包。)
部署LNMP平台
]# wget https://nginx.org/download/nginx-1.17.10.tar.gz
]# yum -y install gcc pcre-devel openssl-devel
]# tar -xf nginx-1.17.10.tar.gz ]# cd nginx-1.17.10/ ]# ./configure --with-http_ssl_module ]# make && make install
]# yum -y install php php-mysql php-fpm
]# yum -y install mariadb mariadb-server mariadb-devel 修改Nginx配置文件
]# vim /usr/local/nginx/conf/nginx.conf … … http{ … … fastcgi_buffers 8 16k; //缓存php生成的页面内容,8个16k fastcgi_buffer_size 32k; //缓存php生产的头部信息 fastcgi_connect_timeout 300; //连接PHP的超时时间 fastcgi_send_timeout 300; //发送请求的超时时间 fastcgi_read_timeout 300; //读取请求的超时时间 location ~ .php$ { root html; fastcgi_pass 127.0.0.1:9000; fastcgi_index index.php; include fastcgi.conf; } … …
启动Nginx、PHP-FPM、MariaDB服务,关闭SELinux与防火墙。]# systemctl start mariadb ]# systemctl start php-fpm ]# firewall-cmd --set-default-zone=trusted ]# setenforce 0 ]# /usr/local/nginx/sbin/nginx
服务器创建PHP测试页面,浏览器访问页面测试网页连通性]# vim /usr/local/nginx/html/test.php <?php $i=33; echo $i; ?> ]# curl https://192.168.2.5/test.php 部署监控服务器Zabbix Server
]# yum -y install net-snmp-devel curl-devel libevent-devel
]# wget https://cdn.zabbix.com/zabbix/sources/stable/4.4/zabbix-4.4.8.tar.gz
]# tar -xf zabbix-4.4.8.tar.gz ]# cd zabbix-4.4.8/ ]# ./configure --enable-server --enable-proxy --enable-agent --with-mysql=/usr/bin/mysql_config --with-net-snmp --with-libcurl ]# make && make install
创建数据库,上线Zabbix的Web页面]# mysql mysql> create database zabbix character set utf8; mysql> grant all on zabbix.* to zabbix@'localhost' identified by 'zabbix'; ]# cd database/mysql/ ]# mysql -uzabbix -pzabbix zabbix < schema.sql ]# mysql -uzabbix -pzabbix zabbix < images.sql ]# mysql -uzabbix -pzabbix zabbix < data.sql
]# cd frontends/php/ ]# cp -r * /usr/local/nginx/html/ ]# chmod -R 777 /usr/local/nginx/html/*
]# vim /usr/local/etc/zabbix_server.conf DBHost=localhost //数据库主机,默认该行被注释 DBName=zabbix //设置数据库名称 DBUser=zabbix //设置数据库账户 DBPassword=zabbix //设置数据库密码,默认该行被注释 LogFile=/tmp/zabbix_server.log //设置日志,仅查看以下即可 ]# useradd -s /sbin/nologin zabbix //不创建用户无法启动服务
]# zabbix_server ]# ss -ntulp |grep zabbix_server //确认连接状态,端口10051 tcp LISTEN 0 128 *:10051 *:* users:(("zabbix_server",pid=23275,fd=4),("zabbix_server",pid=23274,fd=4)
]# vim /usr/local/etc/zabbix_agentd.conf Server=127.0.0.1,本机IP //允许哪些主机监控本机 ServerActive=127.0.0.1,本机IP //允许哪些主机通过主动模式监控本机 Hostname=zabbix_server //设置本机主机名 LogFile=/tmp/zabbix_server.log //设置日志文件 UnsafeUserParameters=1 //是否允许自定义key
]# zabbix_agentd ]# ss -ntulp |grep zabbix_agentd //查看端口信息为10050 tcp LISTEN 0 128 *:10050 *:* users:(("zabbix_agentd",pid=23505,fd=4),("zabbix_agentd",pid=23504,fd=4)
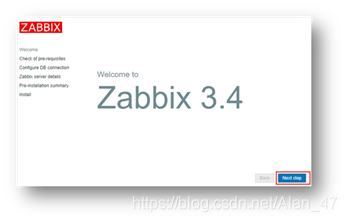
]# firefox https://本机IP/index.php //第一次访问,初始化PHP页面会检查计算机环境是否满足要求,如果不满足会给出修改建议 //默认会提示PHP的配置不满足环境要求,需要修改PHP配置文件
php-bcmath和php-mbstring]# yum -y install php-gd php-xml php-bcmath php-mbstring ]# vim /etc/php.ini date.timezone = Asia/Shanghai //设置时区 max_execution_time = 300 //最大执行时间,秒 post_max_size = 32M //POST数据最大容量 max_input_time = 300 //服务器接收数据的时间限制 memory_limit = 128M //内存容量限制 ]# systemctl restart php-fpm
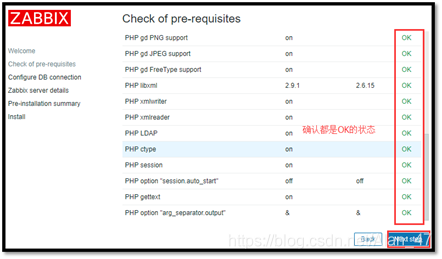
注意:这里有一个PHP LDAP是warning状态是没有问题的!
15. 在初始化数据库页面,填写数据库相关参数,如图所示。

16. 在登陆页面,使用用户(admin)和密码(zabbix)登陆,登陆后设置语言环境为中文,如图所示。


本网页所有视频内容由 imoviebox边看边下-网页视频下载, iurlBox网页地址收藏管理器 下载并得到。
ImovieBox网页视频下载器 下载地址: ImovieBox网页视频下载器-最新版本下载
本文章由: imapbox邮箱云存储,邮箱网盘,ImageBox 图片批量下载器,网页图片批量下载专家,网页图片批量下载器,获取到文章图片,imoviebox网页视频批量下载器,下载视频内容,为您提供.
阅读和此文章类似的: 全球云计算
 官方软件产品操作指南 (170)


